What This Style Looks Like (and Who It’s For)
The kitchen I’m describing isn’t a single style — it’s a philosophy that adapts to whatever look you like. The bones are the same: low-contrast palette, vertical storage to the ceiling, reflective surfaces, and ruthless editing of what sits on the counter.
It bends three ways depending on your taste:
Modern minimal — flat-front cabinets, no visible hardware, integrated appliances, everything in one tonal family.
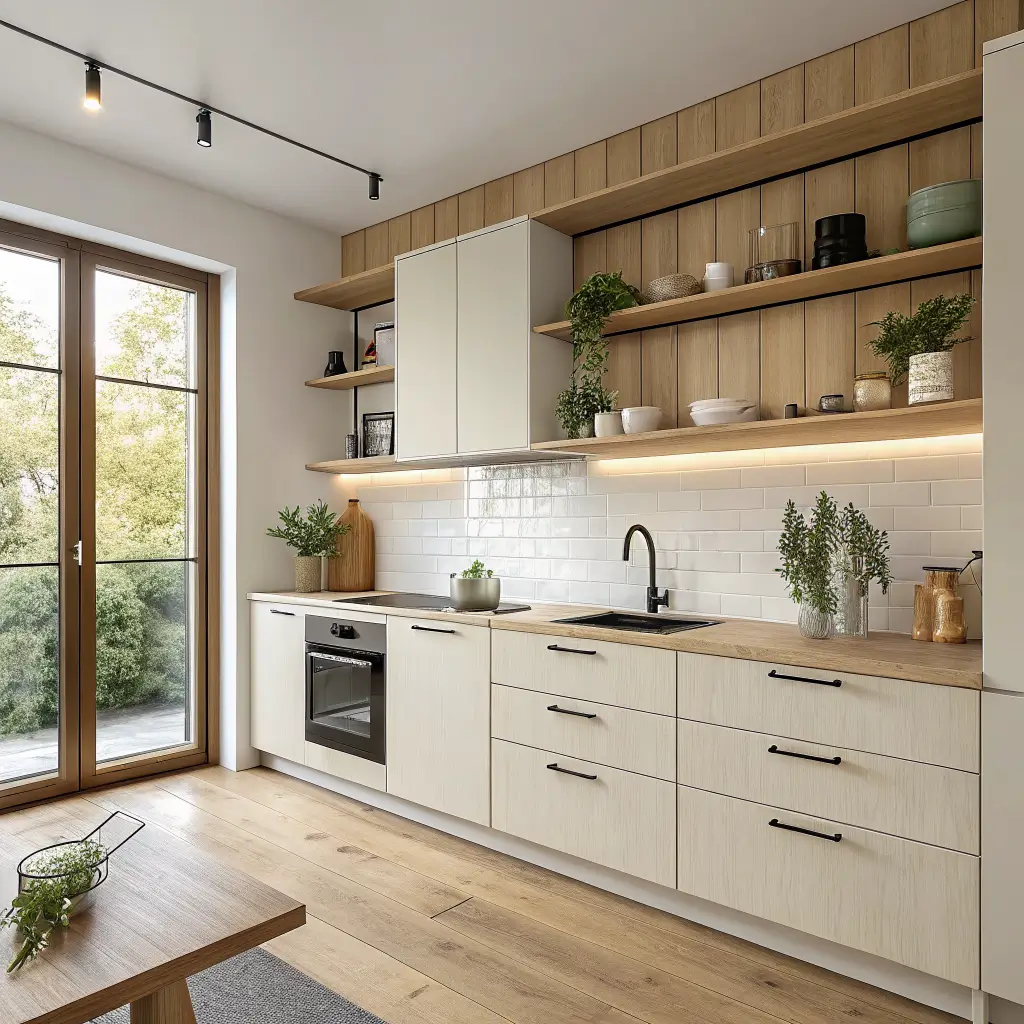
Scandi/Japandi — pale oak shelves, soft whites, slim black accents, one good ceramic piece on display.
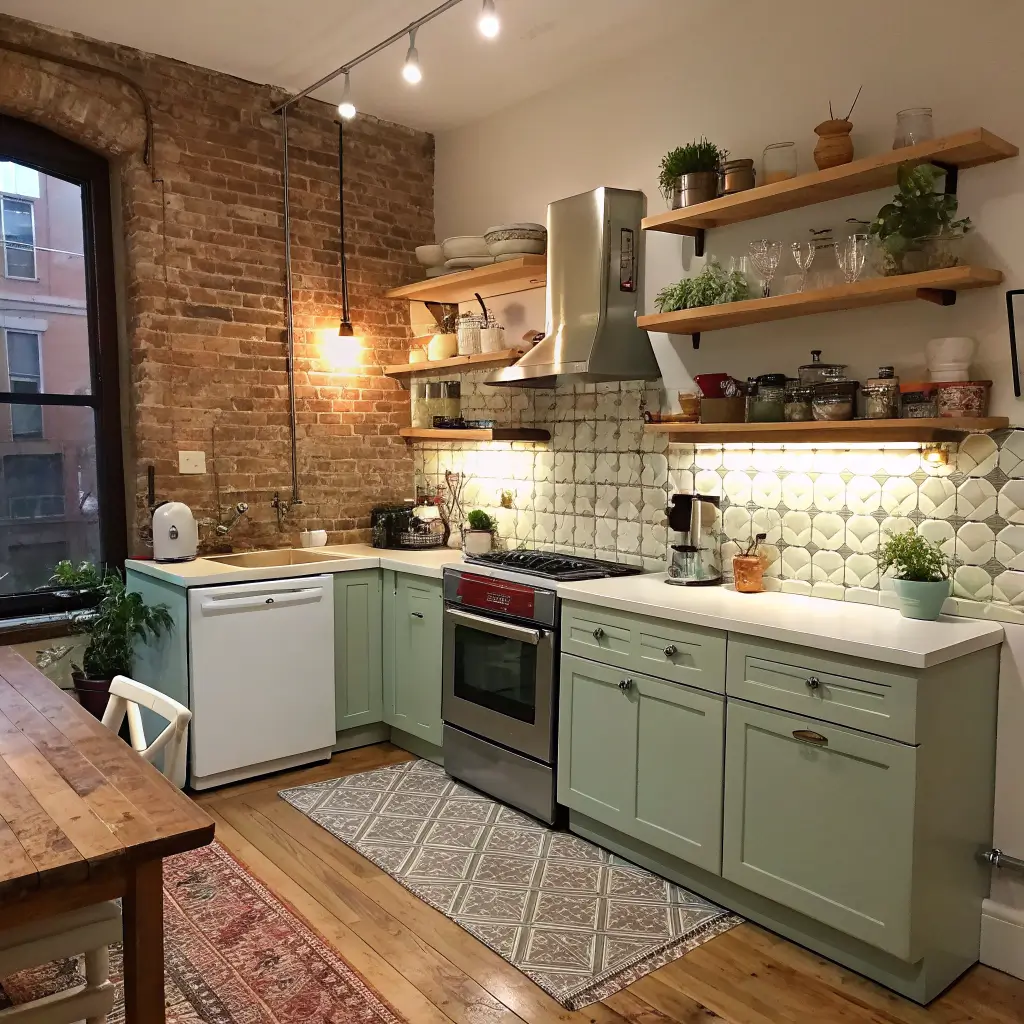
Urban eclectic/renter-friendly — peel-and-stick murals, a patterned runner, mixed metals, pegboards instead of drawers.
Who this is for: renters whose landlord will lose it if you paint a cabinet, condo owners, anyone in an ADU or tiny house, and people who actually cook (not the people who use their oven for shoe storage).
It works best in:
Galley kitchens 5–7 feet wide
One-wall kitchens in studios
L-shaped kitchens carved out of an open plan
Tiny house setups with built-in seating
Time, Money, and Skill — Real Numbers
Light refresh (paint, declutter, styling): one weekend.
Rental cosmetic makeover (peel-and-stick, shelving, plug-in lighting): two to three weekends.
Minor remodel (cabinets, counters, appliances): one to three weeks, contractor-dependent.
Cost ranges I’d actually expect:
Budget renter refresh — $150 to $600. Peel-and-stick backsplash runs $30–$60 for 10–15 sq ft. Peel-and-stick floor for a small kitchen: $50–$120. IKEA LACK or BERGSHULT shelves with brackets: $20–$60 each. Under-cabinet LED strips: $25–$80.
Mid-range upgrade — $1,500 to $6,000. Stock cabinets extended to ceiling: $150–$350 each. A 24″ or 30″ stainless range: $500–$1,200. Laminate or butcher block counter for an 8–10 ft run: $250–$600. An 18″ dishwasher: $450–$900.
Higher-end small renovation — $8,000 to $20,000+. Custom cabinetry to ceiling with pull-outs: $400–$900 per linear foot. Quartz counters: $60–$120 per sq ft installed. A full set of compact appliances: $3,000–$7,000.
Skill level: painting, peel-and-stick, command hooks, and plug-in lights are all beginner territory. Installing open shelves into studs, swapping hardware and faucets, adding a rolling island — intermediate. Moving plumbing, gas, or rewiring — hire it out, full stop.
The Color Palette That Actually Makes a Small Kitchen Look Bigger
The biggest mistake I made the first time was painting my lower cabinets a deep navy because I’d seen it in a magazine. In a galley four feet wide, all it did was make the room feel like a submarine. I repainted them within a year.
Here’s what works:
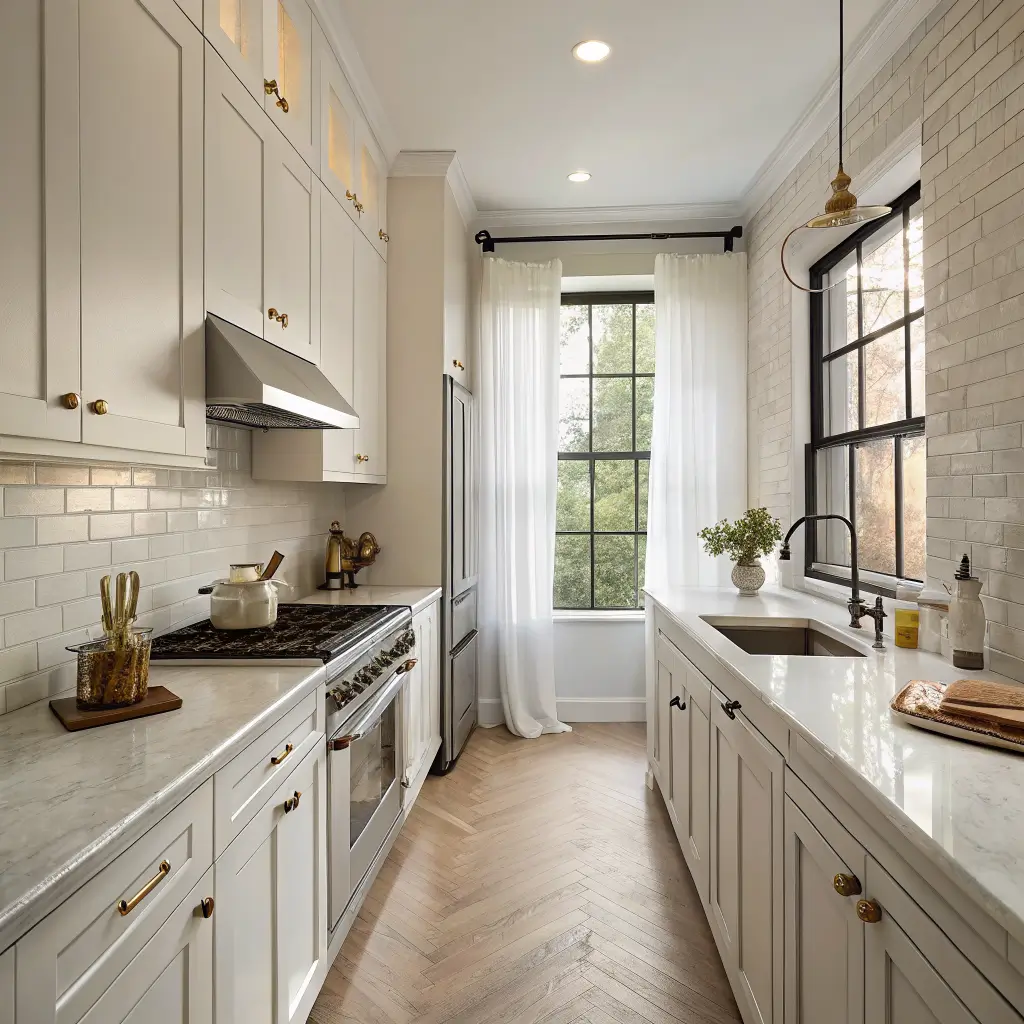
Cabinets and walls in the same tonal family. Benjamin Moore Chantilly Lace, Sherwin-Williams Pure White, or a soft greige like BM Classic Gray. When the cabinet fronts blur into the walls, your eye reads the whole room as one continuous surface, and it feels bigger.
Counters in a similar value range. Butcher block, light laminate, or a pale quartz. High-contrast counters chop the space horizontally.
One real accent. A muted sage, a Lulworth Blue painted nook, a single terracotta runner. Keep it to 10–20% of the visual field, max.
If you want darker tones, put them near the floor — lower cabinets, the rug, the stools. Keep upper space pale to lift the ceiling.
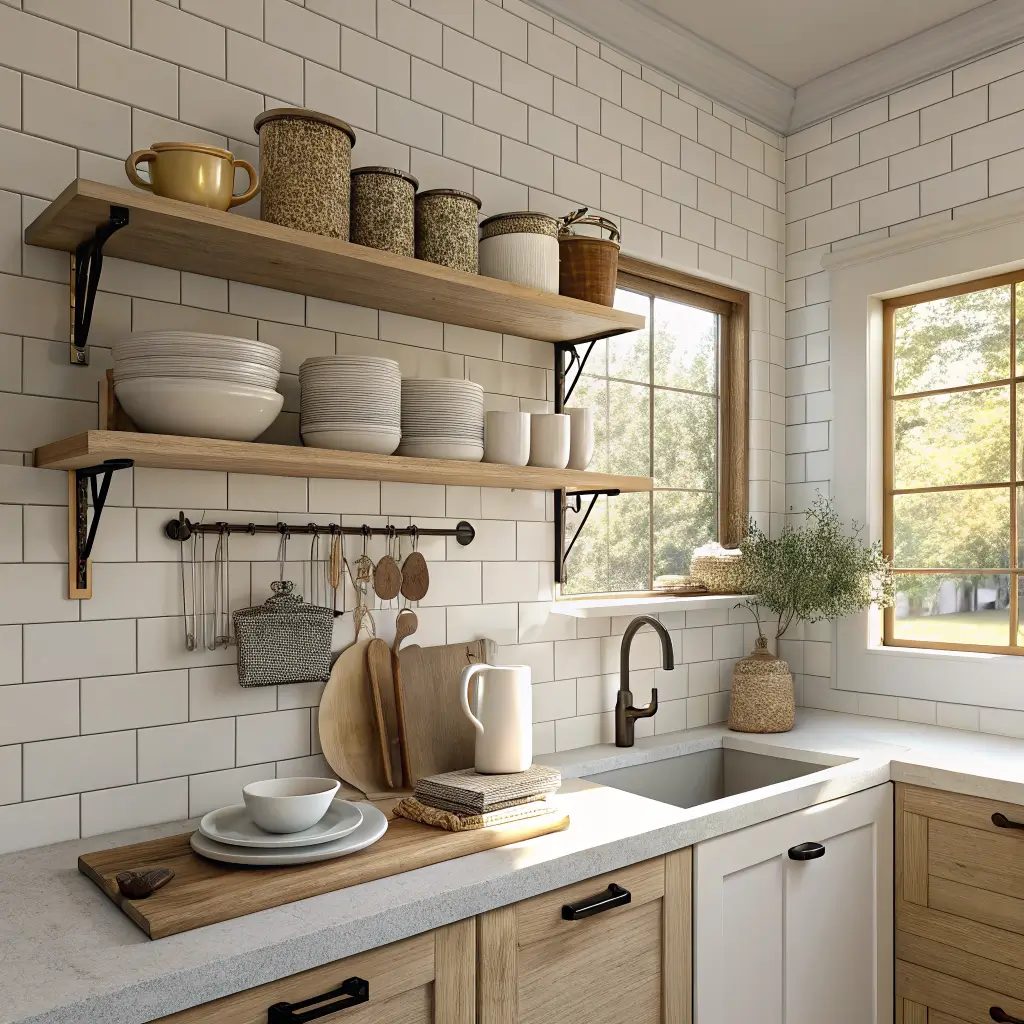
For tile, 3″x6″ subway laid horizontally is the most underrated move in a narrow kitchen. The horizontal lines visually stretch the room wider. I used a soft warm white with light gray grout, and it reads as a single field rather than a grid of tiles.
The Hero Pieces
These are the things that change how the kitchen functions, not just how it looks.
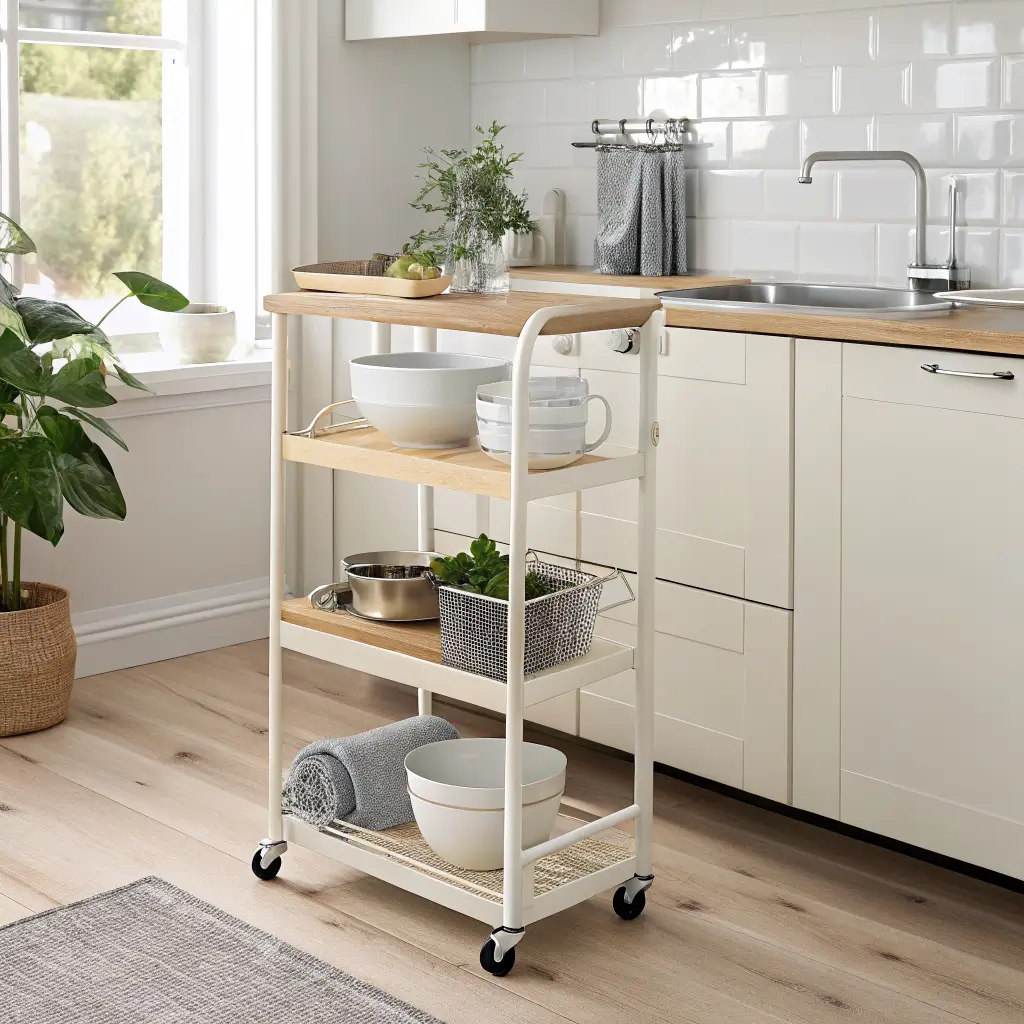
A slim rolling cart, 24″–30″ wide. Mine is an IKEA RÅSKOG that lives shoved against the dishwasher and rolls out when I’m prepping. $120–$400 range depending on whether you want metal, wood top, or drawers. The trick is casters — anything stationary in a tiny kitchen is dead weight.
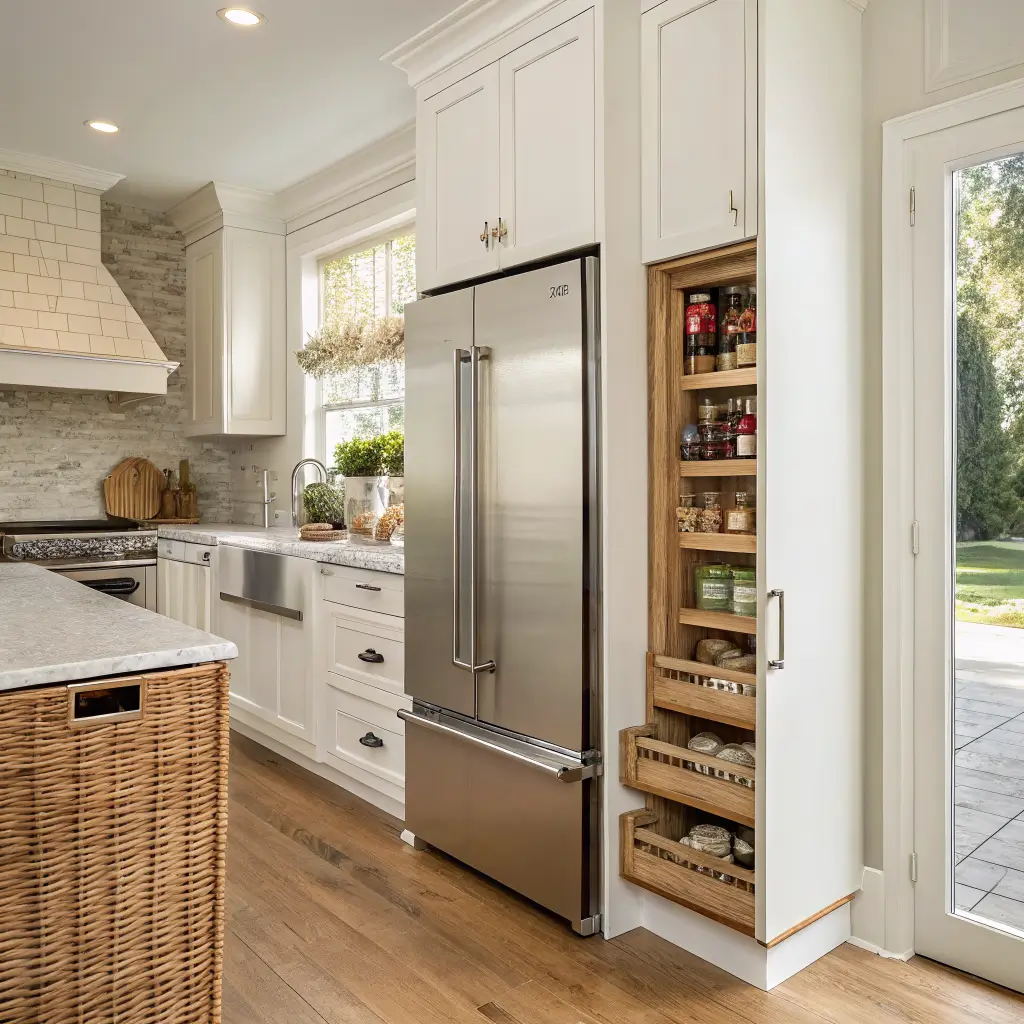
Cabinets extended to the ceiling. If you have a soffit, rip it out if you can; if not, add a set of prefab boxes on top of your existing uppers and paint everything one color. That dead 12–18 inches above your cabinets is the single biggest waste of space in most small kitchens. Use the top shelf for stuff you grab twice a year.
A tall slim pantry or pull-out. If you’ve got an awkward 12-inch gap next to the fridge, a pull-out spice/can rack ($80–$200) is worth every dollar.
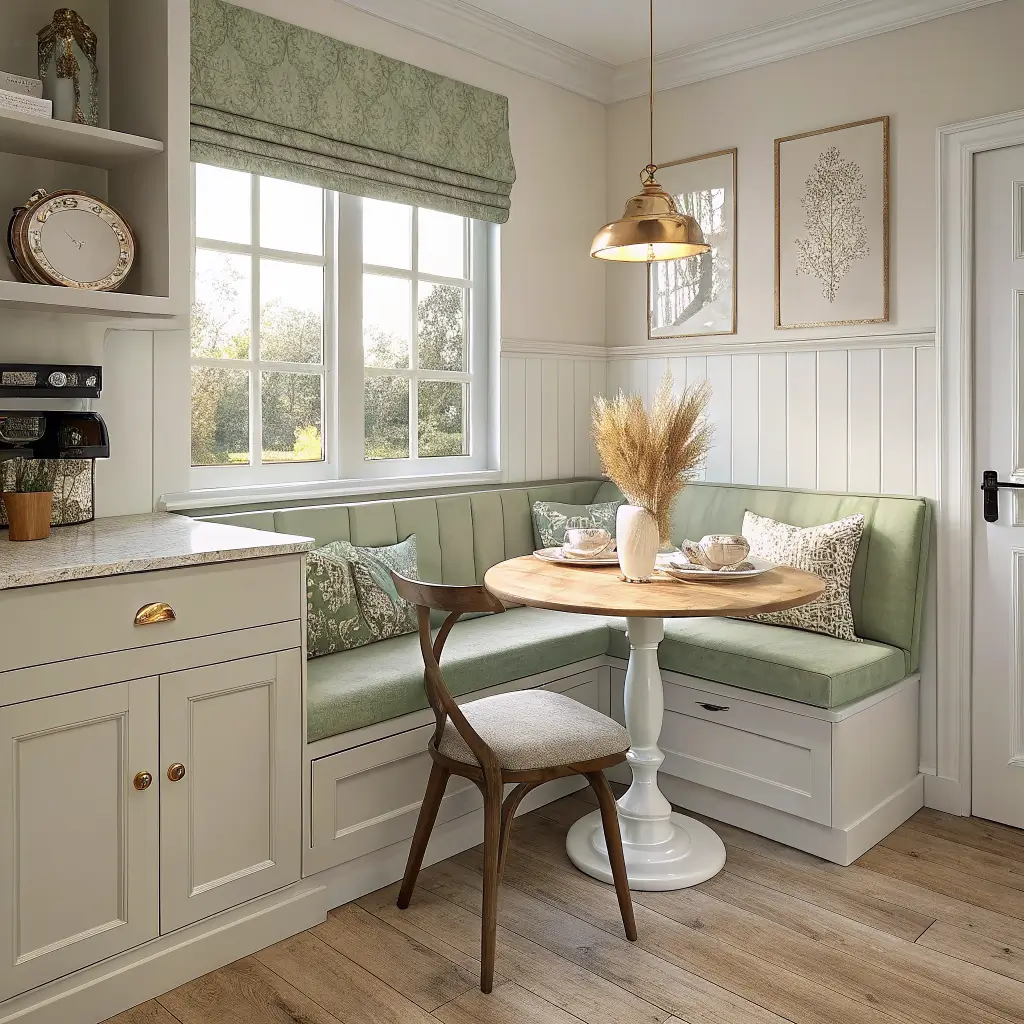
A built-in bench with storage if you’ve got a corner for it. Lift-up lids hide small appliances, party platters, and the air fryer you swore you wouldn’t buy.

Storage That Doesn’t Look Like Storage
Open shelves over the sink or above a low backsplash — for daily-use dishes only. Not the wedding china.
Rail systems and pegboards for utensils, mugs, small pans. I have a 24″ brass rail under my window with S-hooks for my measuring cups. Cost me $35 and freed up a whole drawer.
Magnetic knife strip instead of a block. Your counter gets six inches back.
Toe-kick drawers under the base cabinets if you’re remodeling — sheet pans live perfectly in them.
Over-the-fridge baskets for cookbooks, table linens, or the lunchbox stash.
Lighting (the Thing Most Small Kitchens Get Wrong)
A single overhead boob light is what makes most rental kitchens feel like a dentist’s office. Three layers fix it:
Under-cabinet LEDs — strips for budget, pucks if you want them dimmable. This alone changes the room.
One pendant over the cart, sink, or eating nook. Visual anchor + warmer light.
A slim hood if you’re swapping appliances. A bulky under-cabinet hood eats six inches of cabinet space and dominates the sightline.
Appliances Worth the Money
Counter-depth fridge, 24″–28″ wide. A standard 36″ fridge sticking out three inches into a galley is the worst thing you can do. Fisher & Paykel and Bosch both make slim ones; Summit is the budget option.
18″ dishwasher. Half the width, holds enough for two people easily. Worth it.
Combination microwave/convection oven if you can stretch. Replaces two appliances.
Stainless or other reflective finishes bounce light around. Matte black looks great on Instagram and eats every photon in your kitchen.

How I’d Put It Together, In Order
1. Empty everything. Counters bare, cabinets cleared. Donate the duplicate spatulas, the bread machine you used twice, the chipped mugs from college. A tiny kitchen with editing feels three times bigger than the same kitchen overstuffed.
2. Paint the envelope. Walls, cabinets, and any soffit all in coordinating tones. Satin or semi-gloss for cabinets — easier to wipe down.
3. Go vertical. Add cabinet toppers or extend cabinets to ceiling. Install open shelves where you have empty wall.
4. Backsplash. Horizontal subway, or peel-and-stick if you’re renting. End it cleanly at the cabinet line — don’t let it die mid-wall.
5. Add the storage layers. Rail or pegboard on the prep wall. Pull-outs in the awkward narrow cabinet. Magnetic knife strip near the stove.
6. Lighting. Under-cabinet strips first, then the pendant.
7. Style last. Two cutting boards leaned against the backsplash, one small potted herb, a runner down the galley, and that’s it. If you’re tempted to add a fourth thing, don’t.
Keep at least 36″ of walkway clear, 42″ if two people cook at the same time. Measure before you buy anything that sits on the floor.
Mistakes I’ve Made or Watched Friends Make
Overstuffed open shelves. Eight mugs, four bowls, three vases, two cookbooks, and a candle on one shelf. It looks like a thrift store window. Aim for 30–40% empty space on every shelf.
Too many finishes. I once had chrome faucet, brushed nickel cabinet pulls, black hinges, and a brass light fixture. It looked like a hardware store exploded. Pick one main metal, one accent, done.
An island that’s too big. A 36″ island in a kitchen with 38″ of clearance is not an island, it’s a wall.
Heavy curtains over the only window. Cafe curtains, sheer Roman shades, or nothing. Light is the cheapest renovation.
Ignoring the space above the fridge. That’s a whole cabinet’s worth of storage you’re paying rent on.
Renter-Friendly Swaps That Don’t Trash Your Deposit
Peel-and-stick backsplash (Smart Tiles and Quadrostyle are the ones that don’t look like contact paper).
Peel-and-stick vinyl floor tile over ugly linoleum.
Tension rods under the sink for spray bottles.
Command hooks under cabinets for mugs and measuring cups.
A freestanding pantry cabinet from IKEA you take with you.
Removable wallpaper on one small wall — the inside of an alcove, the wall behind the stove if you’ve got a hood that covers it.
Seasonal Updates Without Redoing Anything
Swap dish towels, the runner, and one small framed print. Total cost under $50.
Rotate plants: basil and mint in summer, eucalyptus or dried wheat in winter.
Magnetic hooks on the fridge for a small wreath in December, a string of paper lanterns in summer.
A Phased Plan If You’re Doing This Over Time
Phase 1 ($100–$200): Declutter, swap hardware, peel-and-stick backsplash, magnetic knife strip.
Phase 2 ($400–$800): Under-cabinet lighting, two open shelves, rail system, washable runner.
Phase 3 ($1,500–$4,000): Counter-depth fridge or compact range, butcher block counter, cabinets extended to ceiling.
The kitchen I cook in now is the same 72 square feet it was when I moved in. It just doesn’t feel that way anymore, because almost nothing sits on the counter, the cabinets read as part of the wall, and the eye has somewhere to land — the pendant over the sink, the brass rail, one good cutting board. That’s the whole trick.
Conclusion
The tiny kitchen ideas that worked for me came from a space under one hundred square feet with a galley layout, open shelves, and a window above the sink. I had painted the cabinets white, added a butcher block counter, and hung a single pendant over the stove. The room was not a show kitchen. It was a kitchen for making breakfast and washing dishes and living your life. And that was enough.